Setting Up ManageIQ Spassky for KVM and Hyper-V

ManageIQ is the upstream open-source project behind Red Hat CloudForms and Red Hat Ansible Automation Platform's infrastructure management layer. It gives you a single pane of glass across heterogeneous hypervisors, pulling inventory, capacity metrics, policy compliance, and automation into one interface. If you have KVM hosts managed through oVirt, Hyper-V machines under System Center Virtual Machine Manager (SCVMM), or a mix of both, ManageIQ can monitor and manage them together without requiring you to deploy separate tools for each platform.
This guide covers deploying the ManageIQ Spassky appliance on VMware (the most common bootstrap environment), completing initial configuration through the appliance console, then connecting both KVM/oVirt and Hyper-V/SCVMM infrastructure as providers. The Hyper-V integration requires one extra step at the gem level that catches most people off guard, so we cover that in full.
Requirements
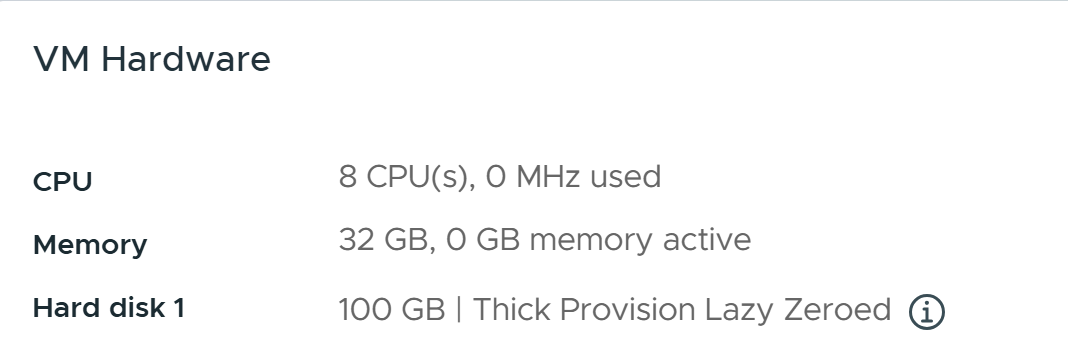
| Component | Minimum | Recommended |
|---|---|---|
| vCPU | 4 | 8 |
| RAM | 16 GB | 32 GB |
| OS disk | 100 GB thick | 100 GB thick |
| Database disk | 50 GB | 100 GB+ |
| Network | Static IP, DNS resolution | Static IP, DNS forward + reverse |
The appliance runs CentOS Stream 9 and ships as a pre-built OVA. Kafka and Zookeeper run inside the appliance itself for the messaging layer, so the RAM requirement is real. Running under 16 GB results in services getting OOM-killed under any load.
Download and Deploy the OVA
Download the latest ManageIQ appliance from the official releases page:
# OVA download (VMware target)
https://github.com/ManageIQ/manageiq/releases
# Look for: manageiq-vsphere-spassky-N.ova
The OVA deploys to any VMware environment that supports vSphere 6.5+. During deployment, you do not need to configure the network at the OVA level. The appliance console handles networking after first boot.
Before powering on, add a second virtual disk. The appliance console will initialize this disk as a dedicated PostgreSQL volume during setup. Using a separate disk keeps your database I/O isolated from the OS and makes it easier to expand later.
First Boot and Appliance Console
Power on the VM and connect to the console. The appliance boots into CentOS Stream 9 and drops to a login prompt. Log in as root with the default password smartvm. You will be prompted to change the password immediately.
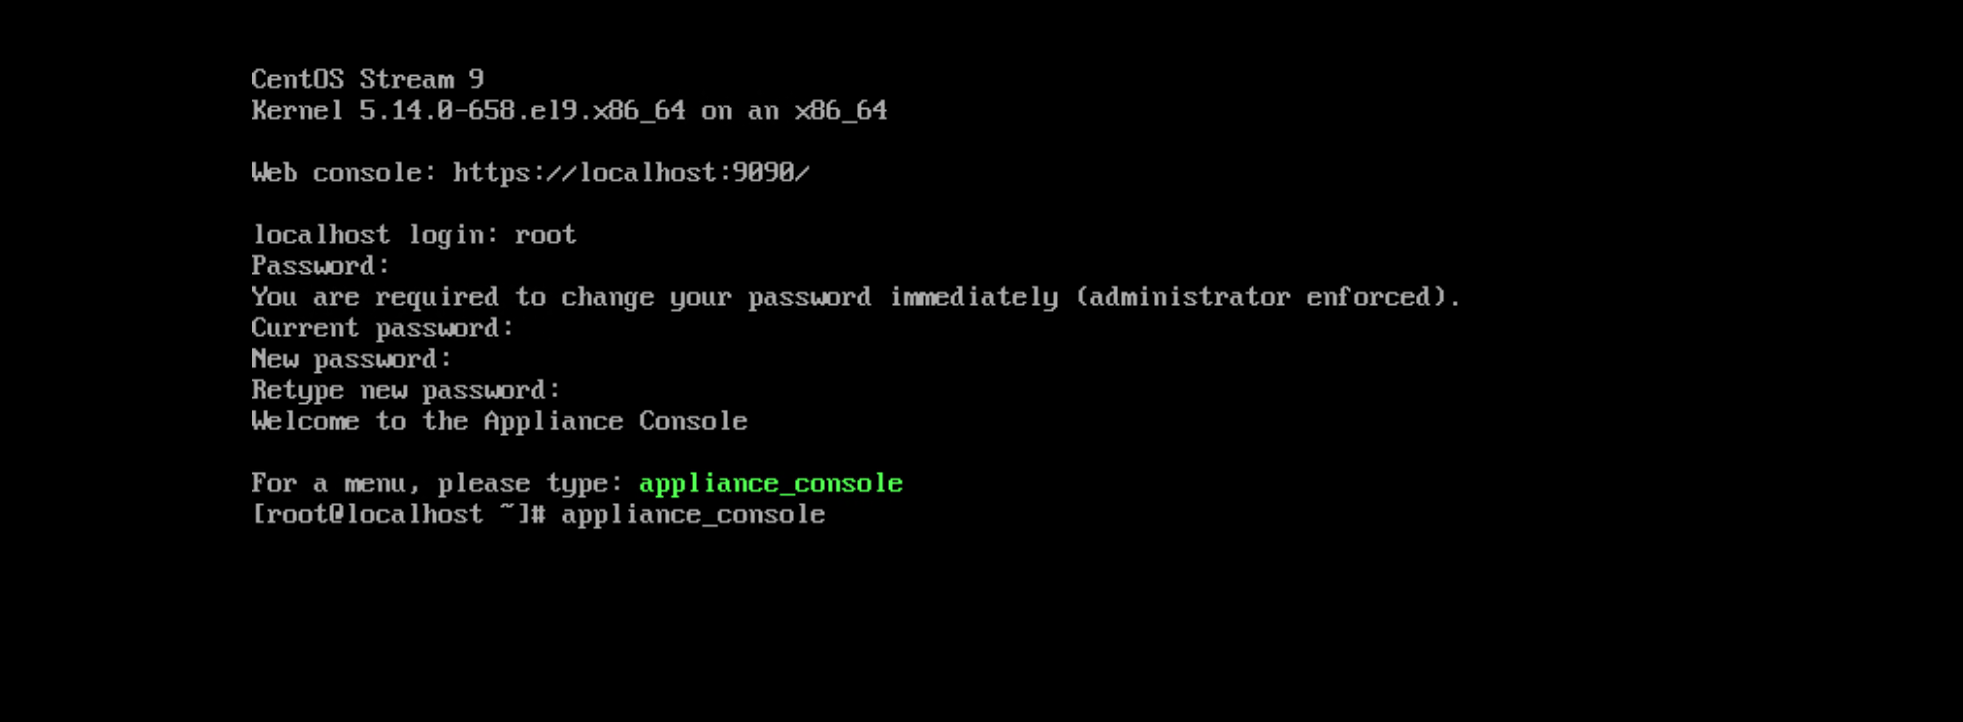
After changing the password, launch the appliance console menu:
appliance_consoleThis opens a TUI with a summary screen showing the current state of all subsystems. On a fresh deploy, everything shows "not configured."
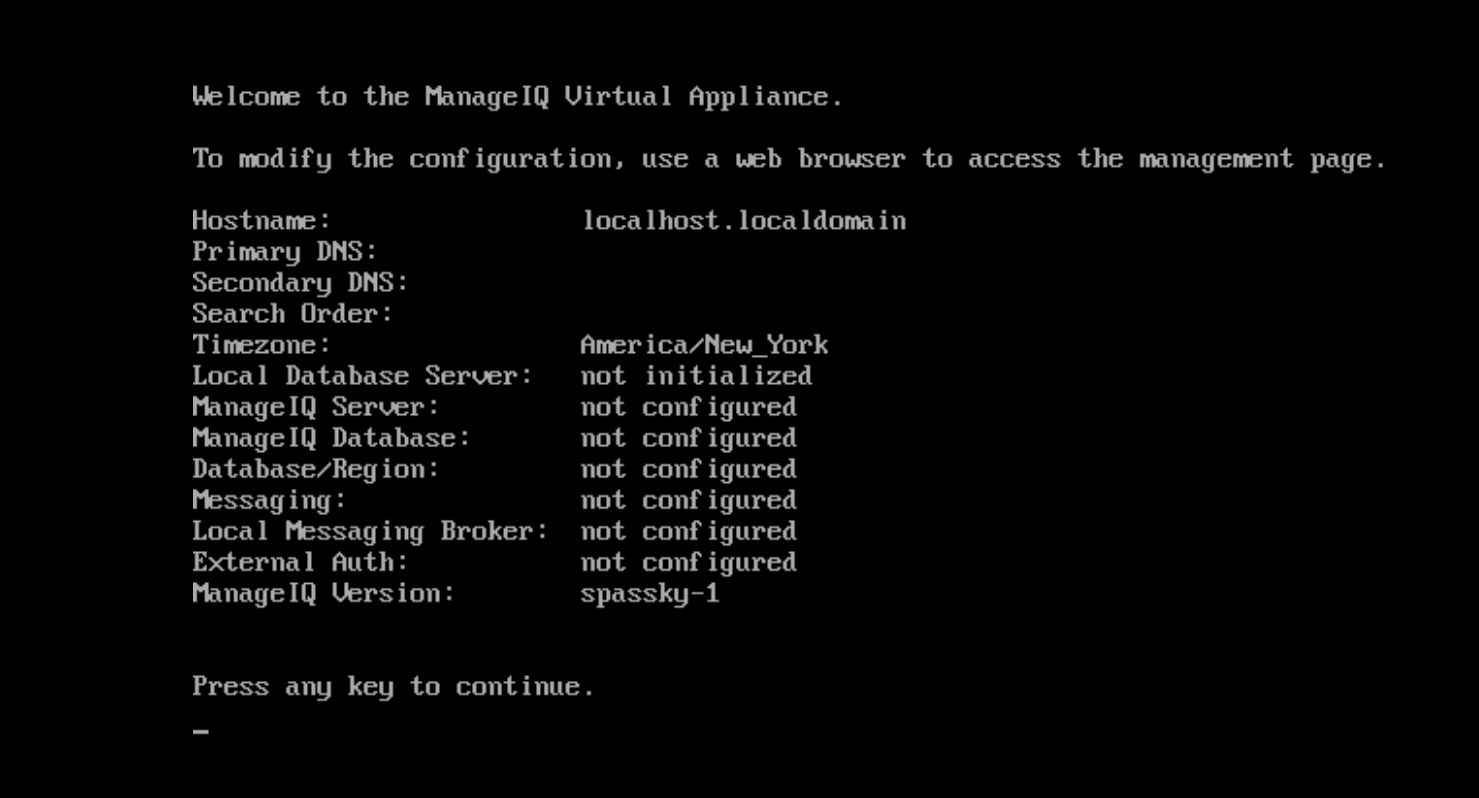
Configure Networking
Press any key to get to the main menu, then choose Configure Network. This launches nmtui, which is the standard NetworkManager text UI. Set a static IP, subnet mask, default gateway, and DNS servers.
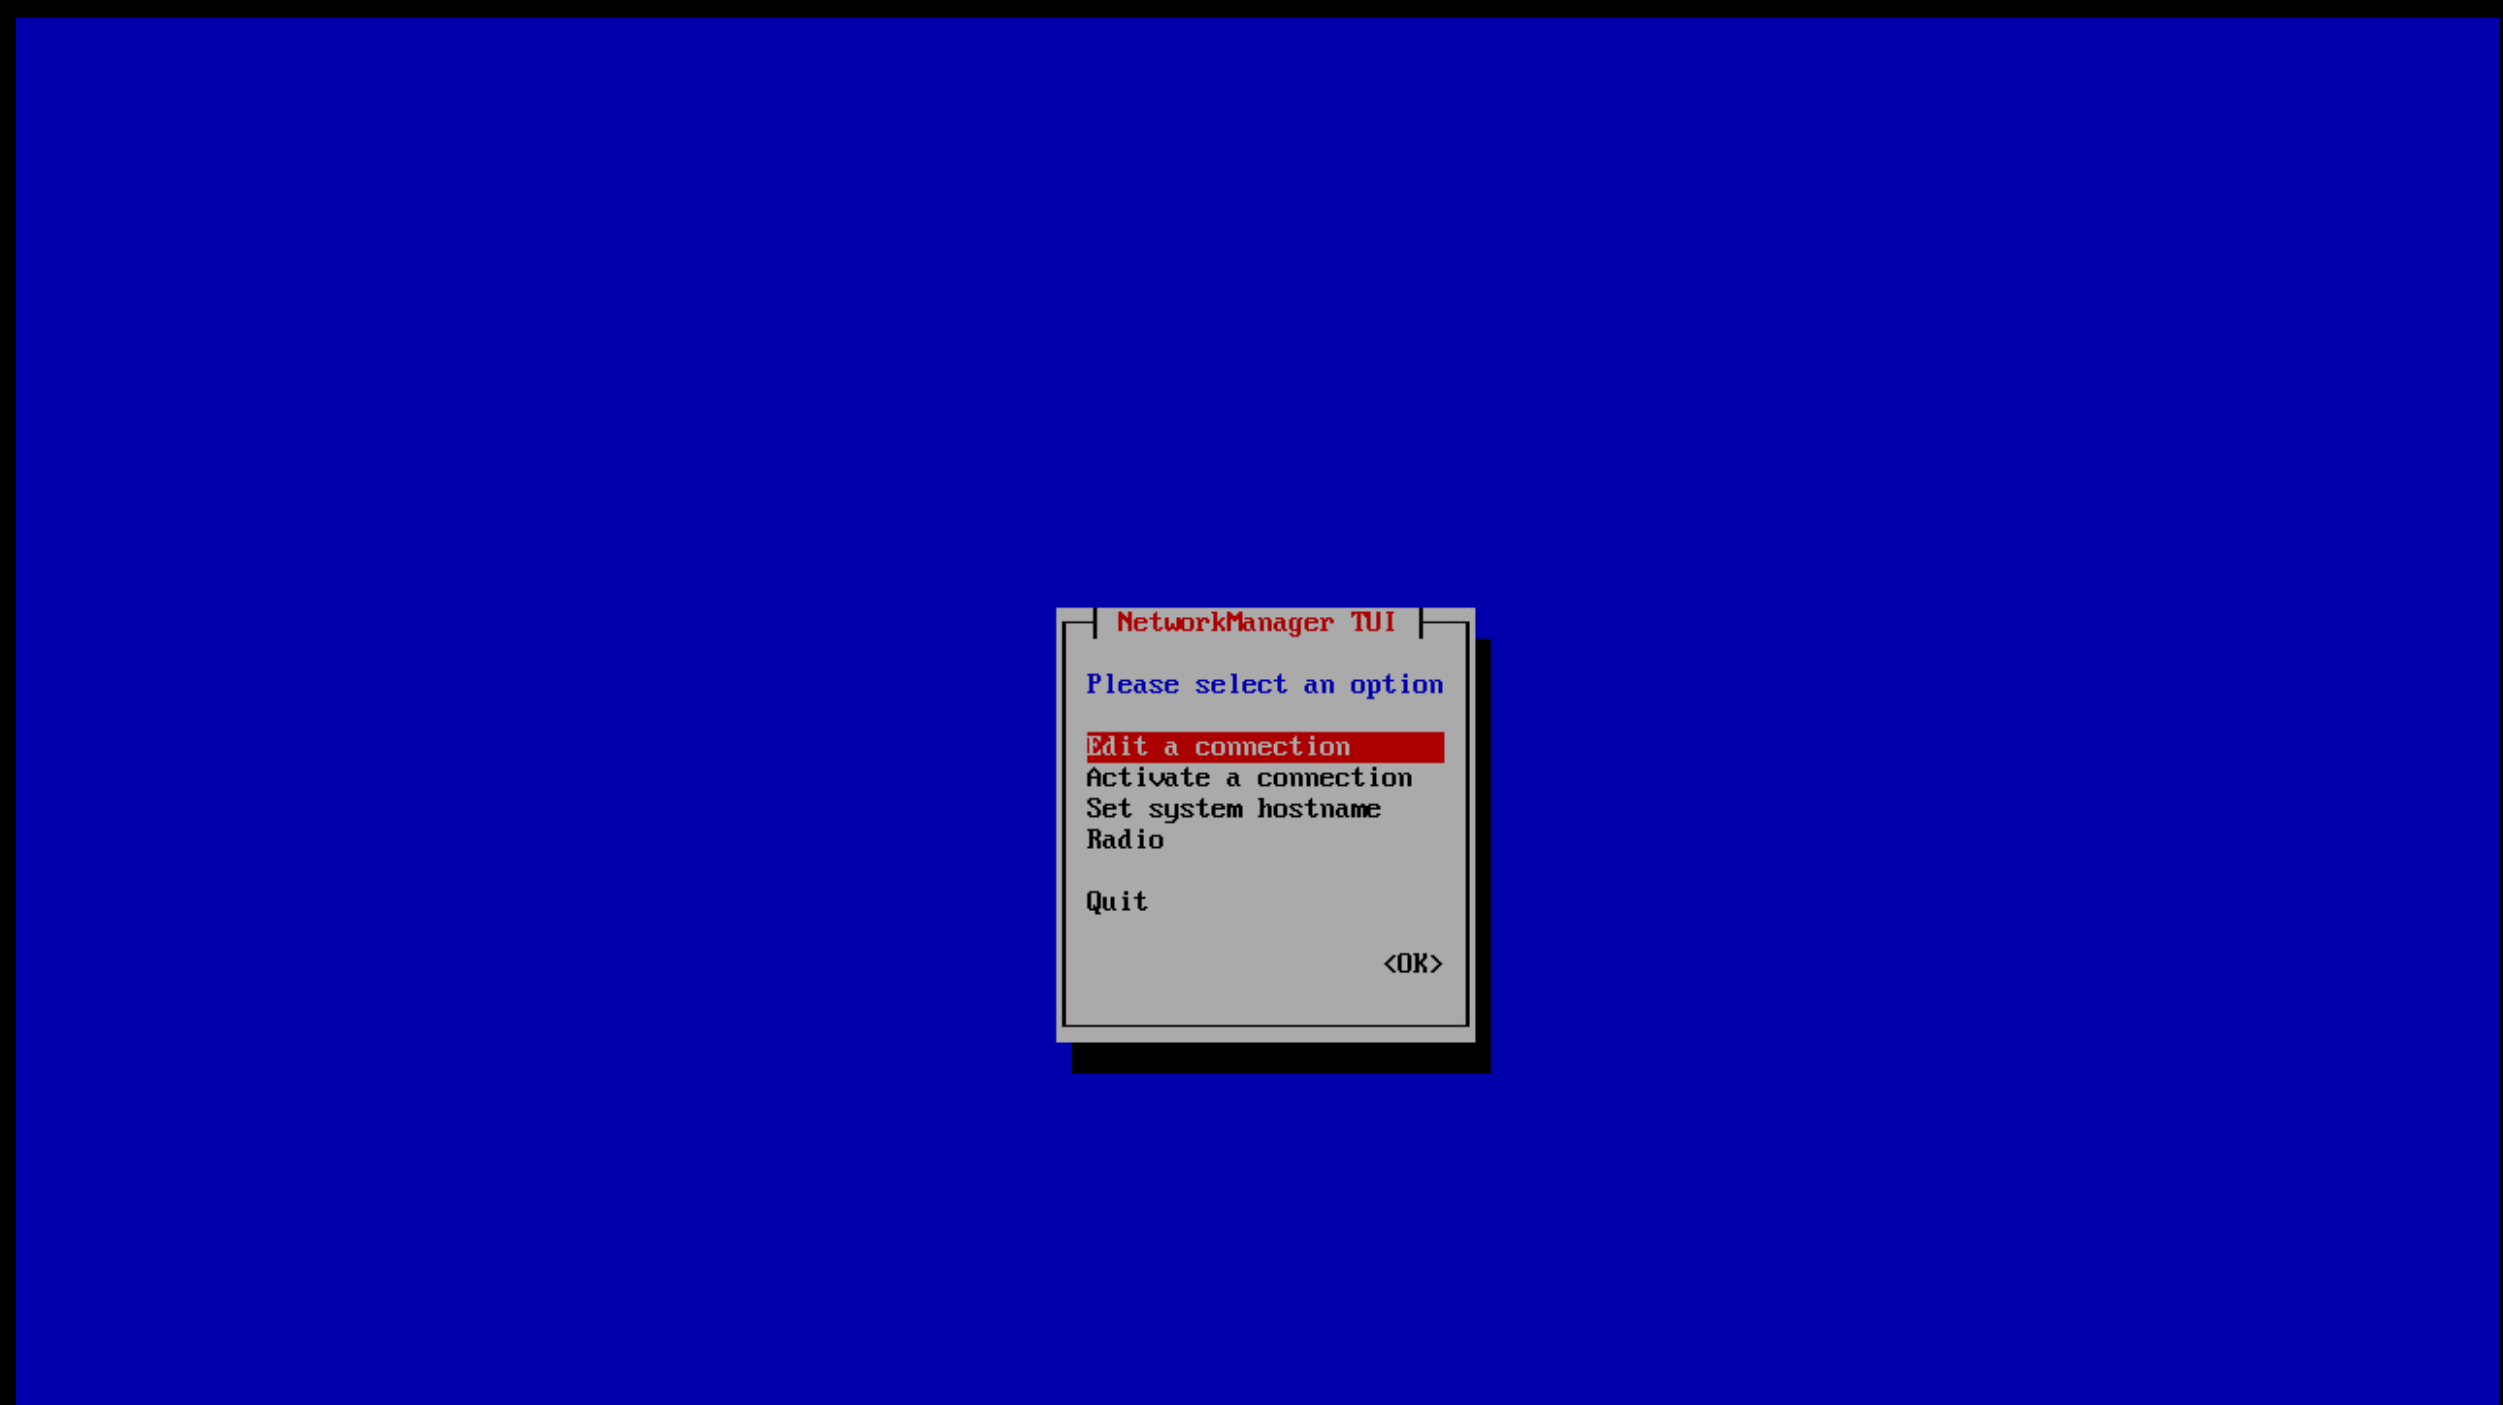
After saving, exit nmtui and return to the appliance console menu. The summary should now show your configured IP address. The hostname at this point is still localhost.localdomain. You will set it as part of the messaging configuration step coming up.
/etc/hosts as a fallback.Appliance Console: Advanced Settings
Return to the appliance console menu and select Advanced Settings (option 5 in most versions). This exposes a sub-menu with all the major configuration steps.

Configure the Database
Select Configure Application from the Advanced Settings menu. The wizard walks you through creating a new internal PostgreSQL database.
When it asks whether to use an existing disk, select yes and choose the second virtual disk you added before powering on. On a standard VMware deployment this will be /dev/sdb.

The wizard then asks for a database region number. This is an integer that uniquely identifies this ManageIQ region. If this is your first deployment, use 01. The region number affects replication topology if you later add remote appliances to the same region.
Each database region number must be unique.
Enter the database region number: 01
Checking for connections to the database...

Create region starting
Create region complete
Database reset successfully
Configure Messaging
Back at the Advanced Settings menu, select Configure Messaging.

Choose to configure this appliance as its own messaging server. The wizard prompts for the hostname, a keystore username, and a keystore password. Enter the fully qualified hostname of this appliance for the hostname field.

The console will verify that the hostname resolves and is reachable, then configure Kafka and Zookeeper. This takes about 30 to 60 seconds. When complete, you will see:
Message Server configured successfully.
Starting ManageIQ Server...getent hosts <yourhost> and fix DNS or /etc/hosts before retrying.Start EVM Server Processes
After the messaging configuration completes, return to the Advanced Settings menu and choose Start EVM Server Processes. The appliance starts the ManageIQ Rails application stack, worker processes, and supporting services. This takes several minutes on first start.
The appliance summary screen will eventually show all key services as running. You can also monitor startup progress from the Cockpit web console at https://<yourip>:9090 or watch the EVM log:
journalctl -fu evmserverdAccess the ManageIQ Web Interface
Once EVM server processes are running, browse to https://<yourip>. The default credentials are:
| Field | Default value |
|---|---|
| Username | admin |
| Password | smartvm |

Configure Server Roles
Navigate to Settings > Configuration > Settings > Server (gear icon at top right). This page controls which roles are active on this EVM server instance. For a standalone single-appliance deployment, most roles should be on. The roles that matter for provider connectivity are:
| Role | Required for |
|---|---|
| Provider Inventory | Collecting VM, host, and cluster inventory from providers |
| Provider Operations | Sending control operations back to providers (power on/off, etc.) |
| Capacity & Utilization Data Collector | Pulling C&U metrics from connected providers |
| Capacity & Utilization Data Processor | Processing and storing the metrics |
| Event Monitor | Subscribing to real-time infrastructure events |
| SmartState Analysis | Agentless introspection of VM disk images |
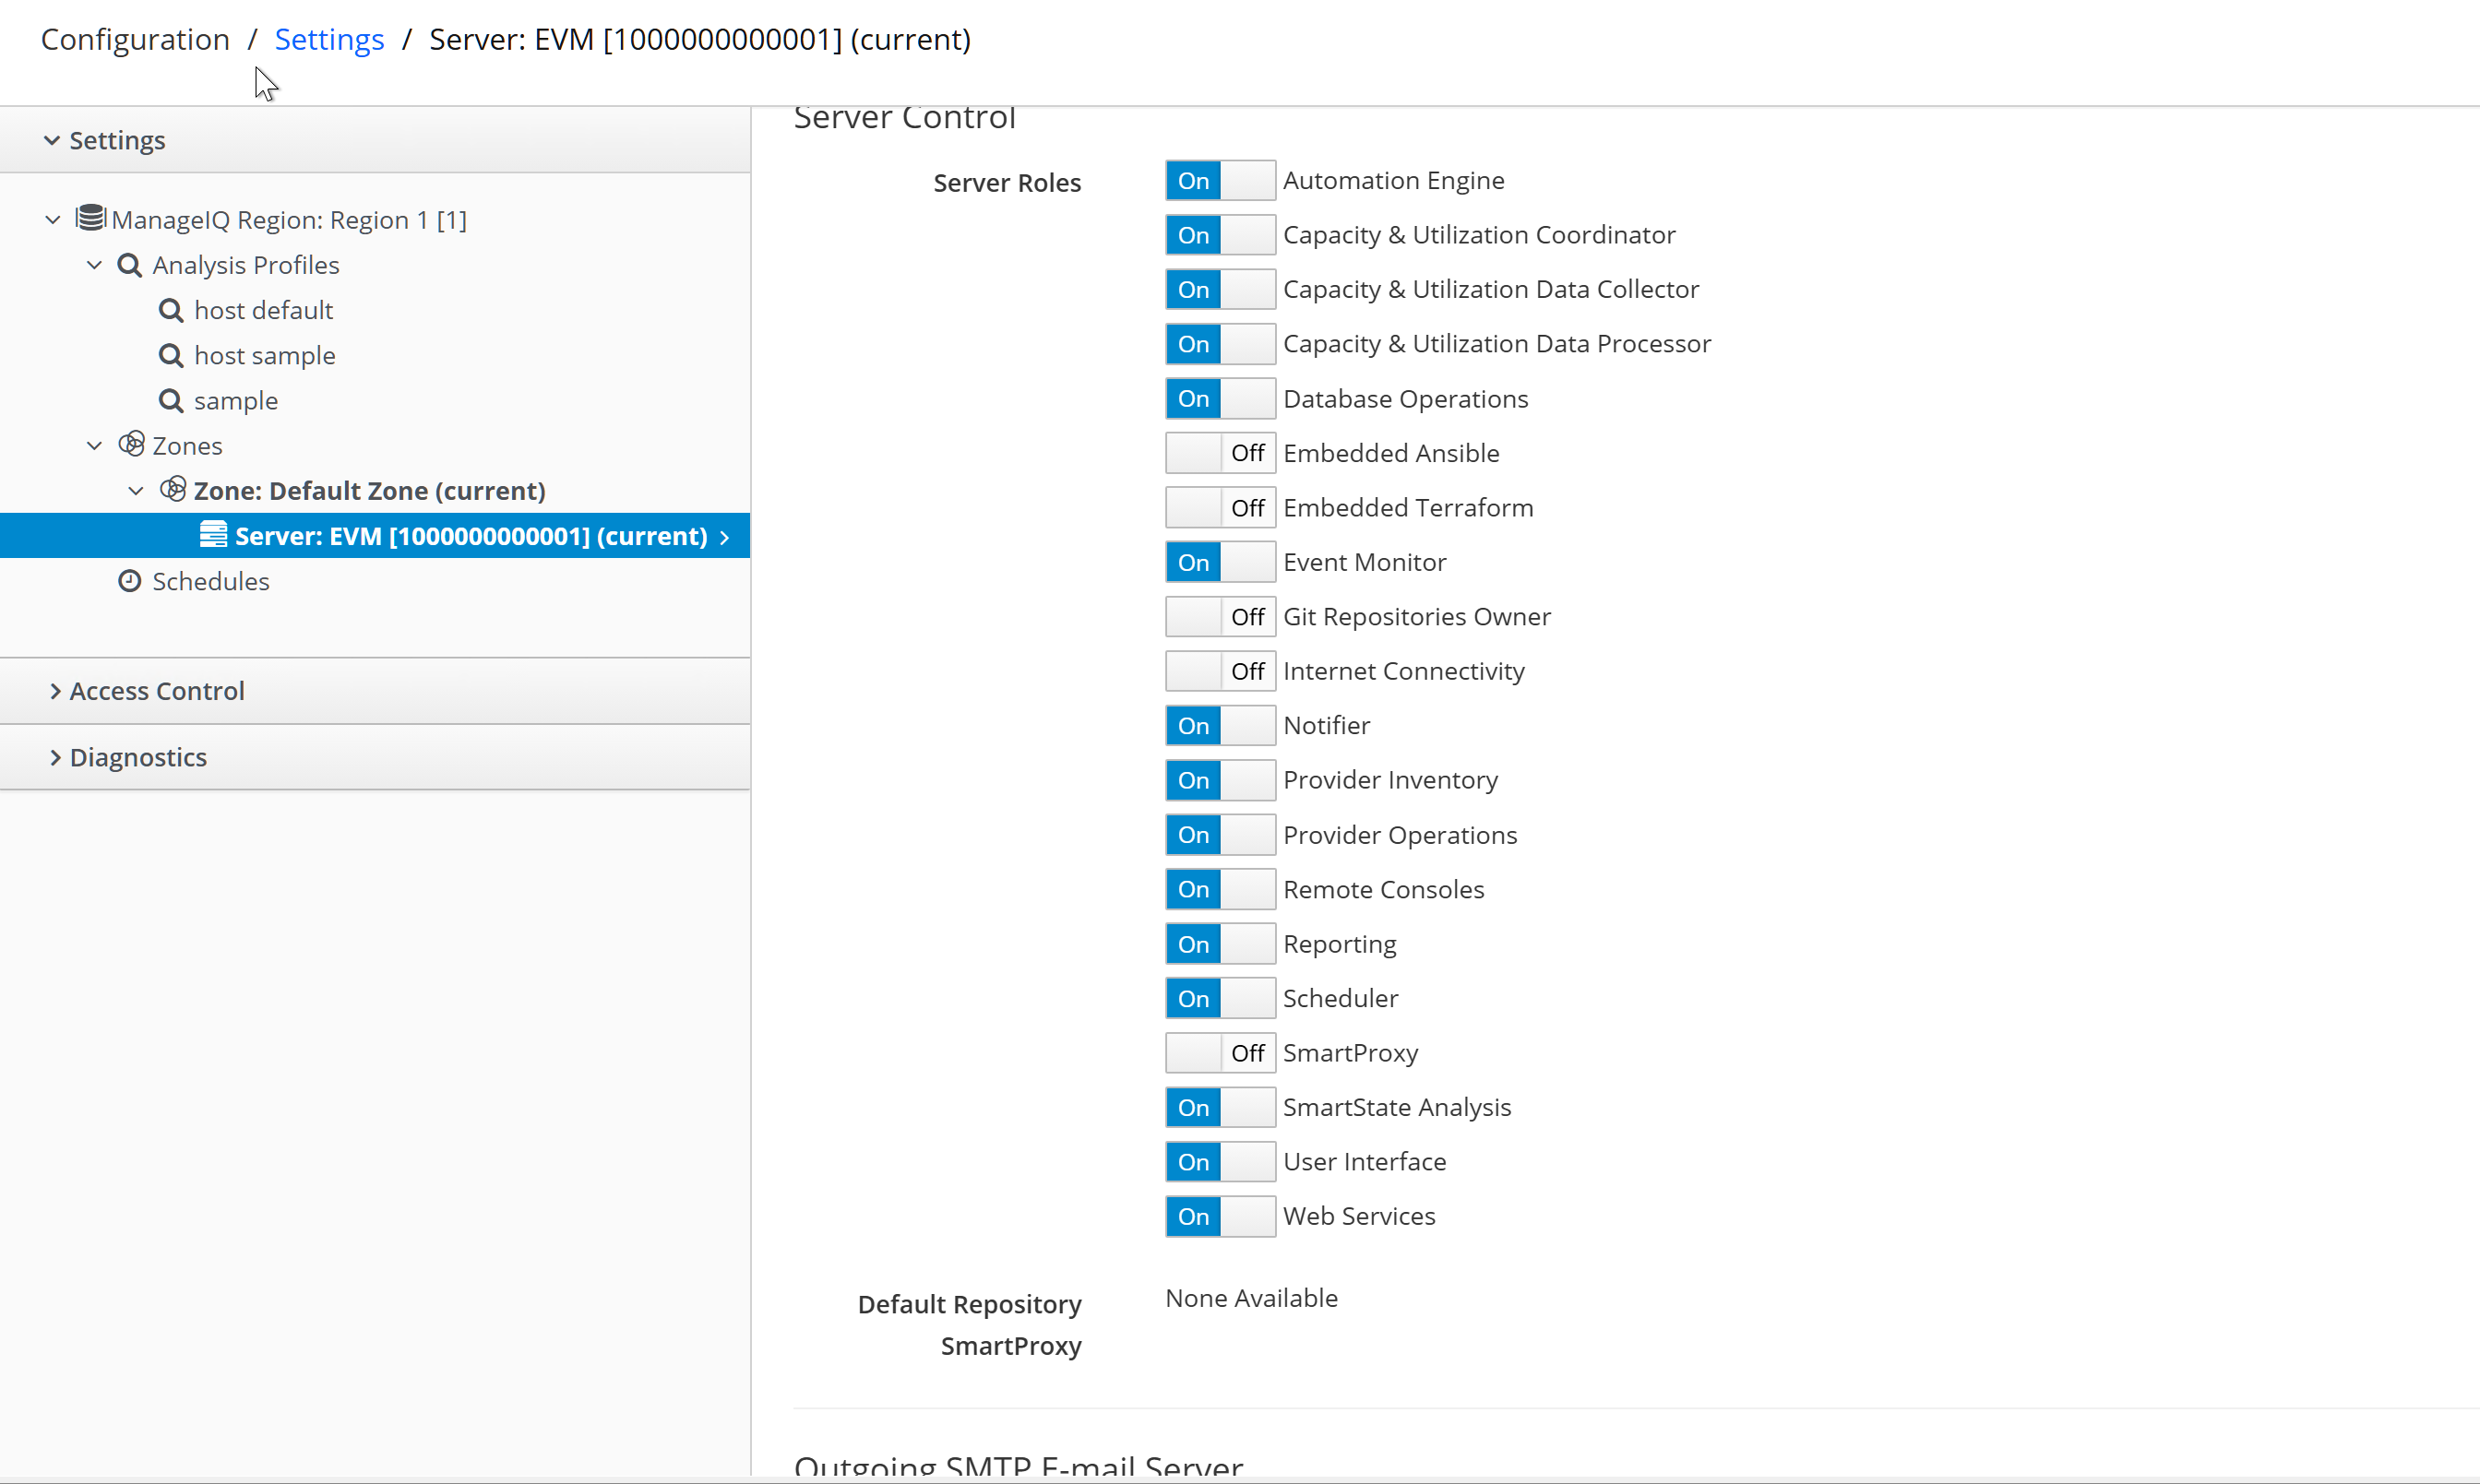
Enable the roles you need and click Save. Role changes take effect at the next EVM server heartbeat, which is approximately 60 seconds.
Connecting KVM (oVirt / RHV) Infrastructure
ManageIQ connects to KVM infrastructure through the oVirt provider type. This requires oVirt Engine or Red Hat Virtualization Manager running and accessible. If your KVM hosts are managed directly without oVirt, use the Red Hat Virtualization provider type and point it at the Manager URL.
Navigate to Compute > Infrastructure > Providers, then click Configuration > Add a New Infrastructure Provider.
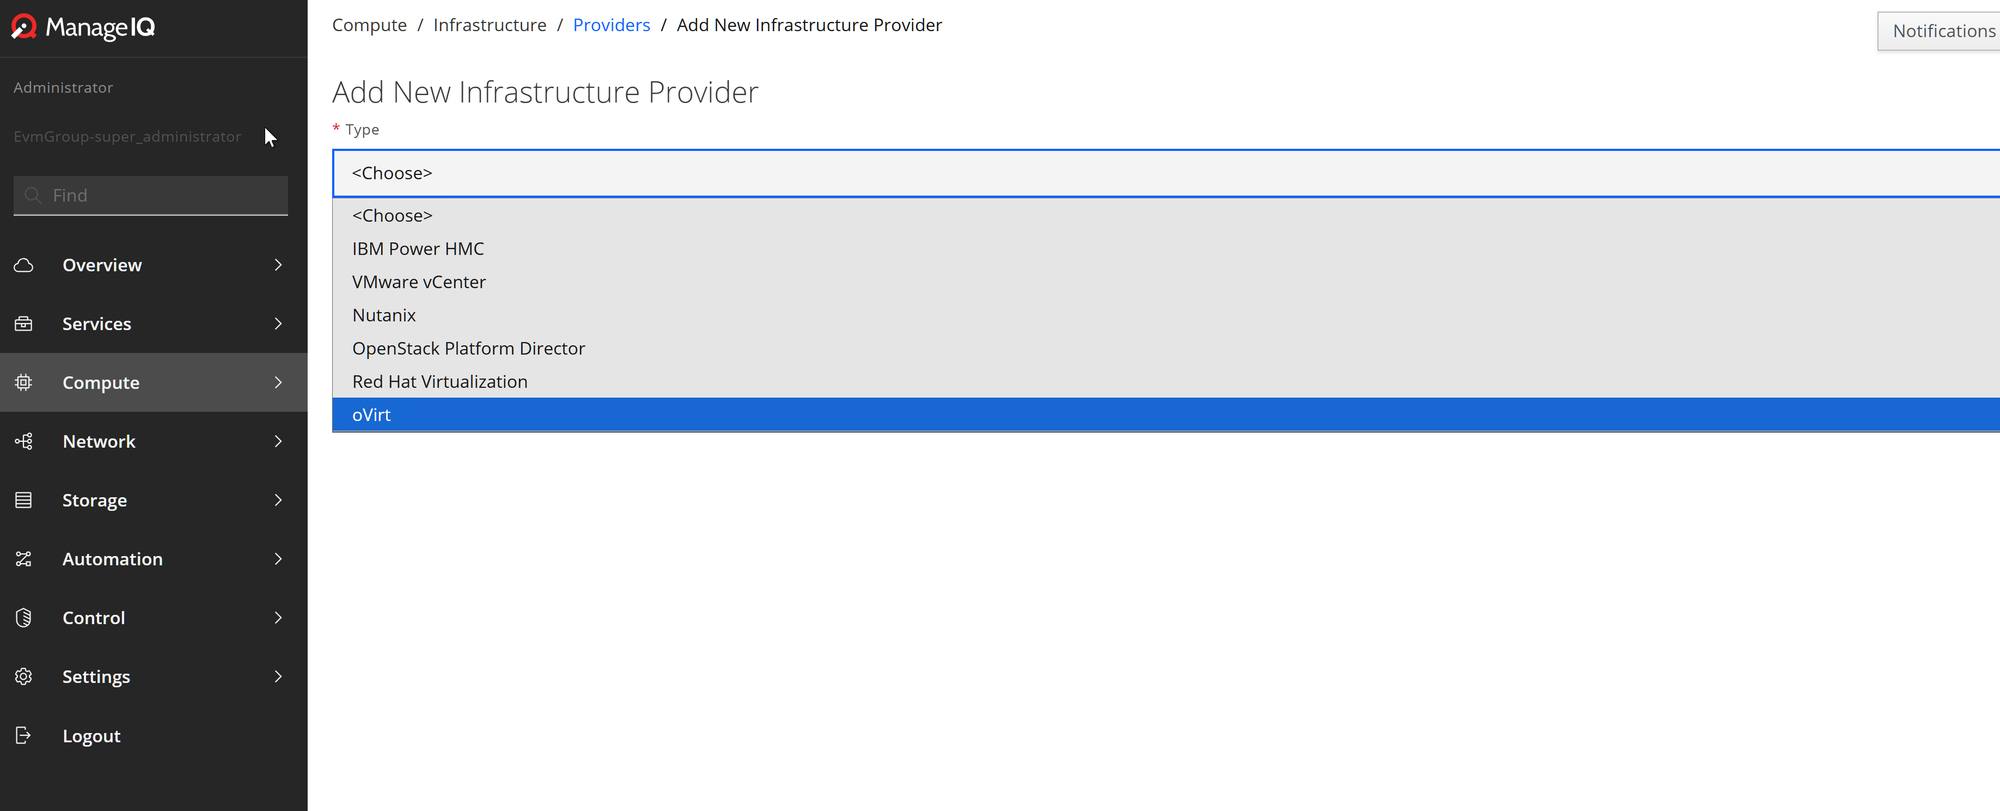
Fill in the provider form:
| Field | Value |
|---|---|
| Type | oVirt |
| Name | A friendly display name (e.g., Production KVM) |
| Zone | default (unless you have custom zones) |
| Hostname | FQDN or IP of your oVirt Engine / RHV Manager |
| API Port | 443 (default, uses HTTPS REST API) |
| SSL verification | Verify if you have a trusted cert, or Do not verify for self-signed |
| Username | A service account with read access to all clusters |
| Password | Service account password |
Click Validate before saving. ManageIQ will test the connection and return a success or error message. Common errors at this stage are certificate verification failures (switch to "Do not verify" to test) and credentials with insufficient permissions. The oVirt service account needs at minimum the UserRole role at the data center level to enumerate all clusters and hosts.
Once validation passes, click Add. ManageIQ will save the provider and trigger an immediate inventory refresh. After a few minutes, navigate to Compute > Infrastructure > Hosts to confirm hosts are appearing.
Connecting Hyper-V (SCVMM) Infrastructure
Hyper-V integration in ManageIQ uses Microsoft's SCVMM provider. Unlike the other provider types, the Microsoft provider gem is not included in the default ManageIQ appliance bundle. You need to install it manually before the provider type becomes available in the UI.
Step 1: Enable the Microsoft Provider Gem
SSH into the ManageIQ appliance and run the following commands. These add the Microsoft provider gem to the bundle and restart the EVM service to load the new code.
# Navigate to the ManageIQ application directory
cd /var/www/miq/vmdb

# Add the Microsoft provider gem to the Gemfile
echo "gem 'manageiq-providers-microsoft', :group => [:microsoft]" >> Gemfile.dev.rb

# Install the new gem (takes 1-3 minutes)
bundle install --with microsoft

# Restart ManageIQ services to load the new provider code
systemctl restart evmserverd--with is deprecated in favor of bundle config set with 'microsoft'. The command still works correctly in Spassky. If you want to use the preferred syntax: bundle config set --local with microsoft then bundle install.After the restart, wait two to three minutes for EVM to fully initialize, then refresh the Add New Infrastructure Provider form. You should now see Microsoft SCVMM as a provider type option.
Step 2: Configure the SCVMM Provider
Navigate again to Compute > Infrastructure > Providers > Add a New Infrastructure Provider and select Microsoft SCVMM.
| Field | Value |
|---|---|
| Type | Microsoft SCVMM |
| Name | A friendly display name (e.g., Production Hyper-V) |
| Zone | default |
| Hostname | FQDN or IP of the SCVMM server |
| Port | 5985 (HTTP) or 5986 (HTTPS) for WinRM |
| Username | Domain service account with SCVMM Administrator role |
| Password | Service account password |
ManageIQ communicates with SCVMM over WinRM (Windows Remote Management). The service account must have the SCVMM Administrator role, not just Delegated Administrator. Delegated Administrator lacks the PowerShell runspace permissions that ManageIQ requires for inventory collection.
Enable-PSRemoting -Force
winrm set winrm/config/listener?Address=*+Transport=HTTP '@{Port="5985"}'Validate the connection, then click Add. The initial SCVMM inventory refresh collects hosts, VMs, templates, and logical networks. Depending on the size of your environment, the first refresh can take 10 to 30 minutes.
Verifying Provider Connectivity
After adding both providers, navigate to Compute > Infrastructure > Providers to see the unified list. Each provider entry shows the discovered host count, vCore count, and total memory. If these are all zero after 10 minutes, click the provider name and check the provider timeline for error events.
Common post-add issues:
| Symptom | Likely cause |
|---|---|
| Provider shows 0 hosts after 15 min | Provider Inventory role not enabled, or service account lacks read rights on clusters |
| Authentication Error in timeline | Credentials rejected by the endpoint; revalidate the provider |
| Connection refused | Firewall blocking port 443 (oVirt) or 5985/5986 (SCVMM) |
| SSL certificate error | Set SSL verification to "Do not verify" on the provider form |
| SCVMM "No such runspace" | WinRM not enabled on SCVMM server; run Enable-PSRemoting |
To force a full re-inventory, select the provider in the list, click Configuration > Refresh Relationships and Power States. This queues an immediate inventory task regardless of the scheduled interval.
Enabling Capacity and Utilization Collection
By default, ManageIQ collects inventory (hosts, VMs, clusters) but not real-time metrics. To enable C&U data collection, you need to configure the provider to capture metrics and ensure the C&U server roles are active.
For oVirt, navigate to the provider record and click Configuration > Edit this Infrastructure Provider. On the C&U tab, enable collection and set the collection interval. oVirt exposes metrics through its own REST API; ManageIQ polls this directly.
For SCVMM/Hyper-V, performance data collection uses Windows Performance Counters over WinRM. The SCVMM service account needs read access to performance counter data on each Hyper-V host, not just on the SCVMM server itself. If C&U shows no data for Hyper-V hosts, check that the service account is in the local Performance Monitor Users group on the Hyper-V host machines.
What You've Completed
- Deployed the ManageIQ Spassky OVA on VMware with correct hardware sizing
- Configured networking, database, and messaging through the appliance console
- Accessed the ManageIQ web interface and configured server roles
- Connected KVM/oVirt infrastructure as an infrastructure provider
- Enabled the Microsoft provider gem and connected Hyper-V/SCVMM infrastructure
- Verified provider inventory and configured C&U data collection